A Quilty Kind of Girl

April 27, 2010

Tuesday Tutorial – Whirly Wheels Quilt

Filed under: Tutorial Tuesday — quiltcetera @ 5:00 am
Tags: , ,

Head on over to Moda Bake Shop for today’s Tutorial! 🙂

The Zigster and The Whirly Wheels Quilt!

The Zigster and The Whirly Wheels Quilt!

If you are interested in a kit for this quilt, they are available at the Fat Quarter Shop.

Quilty Hugs!
Bradie

PS. Come back tomorrow when I will announce the winner of the Layer Cake Giveaway!!

April 20, 2010

Tutorial Tuesday – Basting Large Quilts with Misty Fuse

Filed under: Quilting,Tutorial Tuesday — quiltcetera @ 5:00 am
Tags: , ,

Are you excited? Have you been looking forward to learning how you can baste a larger quilt with Misty Fuse, and ALMOST no pins? 😉 It’s really close to pinless, HONEST!! So I’m going to show you how to baste a backing to batting using Misty Fuse. Now it really doesn’t matter, if it’s the quilt top or the quilt backing, because both sides have to be done right? and the trouble here is that I can not show you this quilt, as it is my next Bake Shop goodie, and well, you all know that MUST remain a surprise!!

FYI – The table I did this process on, is exceptionally wide. A typical ironing board might work depending on the size of your quilt. The batting will be layered up which will protect your surface, but chose where you baste your quilt wisely. You are pressing, and dealing with high heat. If you had an area large enough to lay out the entire quilt, it would save you from having to fold.
This quilt backing measures 44 X 55.

A few abbreviations before I begin…
H = Horizontal
V = Vertical
MF = (guess?!) Misty Fuse

MistyFuseBaste1

Fold batting in half horizontally. Pin the left and right side to mark the vertical centers of the batting. Also place a pin at the horizonatal center. This will assist you to line up the layers of your quilt accurately.

Yes! This IS two photos spliced together… what mad photo editing skills right? 😉
Misty Fuse Baste 2

Roll out Misty Fuse horizontally along the fold, from edge of batting to opposite edge of batting.

MistyFuseBaste3

The backing fabric must be folded with right sides of fabric together. Find the horizontal center before placing quilt. LIne up the H center of batting and backing then pin. Smooth fabric evenly to one side and pin the V center of batting and backing. Repeat for other side. Press evenly starting in center, working out towards the sides. Do not allow iron to contact MF.

Misty Fuse Baste 4

At the edge of the fused area, fold back the backing. Roll out another layer of MF as close to the edge as possible.

Misty Fuse Baste 5

Flip the backing fabric over the MF to press in place.

Misty Fuse Baste 7

The top half of the backing is fused in place. The lower half has been unfolded and now needs fusing.

Misty Fuse Baste 8

Fold back the fabric which needs fusing. Lay out MF along the previously fused edge. Fold fabric back over MF, smotthing out evenly from middle. Press in the same manner.

Misty Fuse Baste 9

Place MF under the remaining area in need of fusing. Fold fabric over, and press to finish fusing the backing to the batting.

Once you have basted the backing, you may then flip the whole thing over, and carry on to baste the front. Do not forget to center the top onto the batting. If you have any questions at ALL, do not hesitate to ask in the comments, or even send me an email. I’m always happy to help. 🙂

Now for the REALITY CHECK!!
Here in Canada, I can purchase a meter ( hehe an extra 3 inches!!) of Misty Fuse at my local quilt shop for $5.
39 X 20 inches = $5.
My quilt = (40 X 50) + backing (44 X 55) = 2.56m + 3.10m = 5.56 m of Misty Fuse
5.56m X $5/m = $27.80

$27.80 to baste a crib size quilt. Seems a little pricey, but consider, if we bought the large 100 yard bolt, directly from Misty Fuse, the price drops to $2.25 per YARD ( so a slight difference in calculation.), which would make the price roughly HALF! Considerable savings right? PLUS!! I just noticed that MF is ALSO available in 35 inch wide! *SWEET*

What it all comes down to my Quilty Friends, is how much do you HATE to baste quilts with pins?! Is it worth the investment? Personally, I think so, but this is a choice you will need to evaluate for yourself. 🙂

Before I sign off, don’t forget to enter the Make Life Layer Cake Giveaway.….

Quilty Hugs,
Bradie

April 6, 2010

Tutorial Tuesday – Pinless Basting (and Misty Fuse Giveaway!)

So What is Misty Fuse? you ask….

“Mistyfuse®

Use paper-less Mistyfuse® for all weights of fabric from velvets and cottons to delicate tulles and organzas. It’s a dream to work with—it handles well, is incredibly sheer, doesn’t add bulk to your fused piece and bonds firmly once cooled. And since there is no added adhesive, it will never gum up your scissors or quilting needles. Each package comes with simple instructions for easy fusing with no waste. Mistyfuse White is perfect for fusing with any fabric.”

(shhhhh. I stole that straight from the website. :P)  http://www.mistyfuse.com/

I first discovered this amazing substance a few years ago. A customer had come to the LQS where I played around worked, and was looking for an alternative to pin basting her quilts. ( Seriously, aren’t we all?) So the owner showed her Misty Fuse. The customer loved it so much, she was back the next day to order several bolts. Something about the whole situation just made me want to try it. This is NOT the only use for this product and I plan to show you more fabulous things you can do, but for now, enjoy the idea of painless basting your quilts.

50 yards of Misty Fuse

This is the 50 yard bolt of Misty Fuse that I won on Facebook!

Misty Fuse is very light and sheer.

You can barely see it, as Misty Fuse is so lightweight. You will never know it is inside your quilt!

Batting laid down with Misty Fuse layered over top.

I have laid the batting down first. Next I laid Misty Fuse over top. Batting and MF are larger than my quilt top.

Quilt top finishes part one of the sandwich.

Now the quilt top goes on top of the Misty Fuse. At this point I will press the top starting in the center and evenly cover the entire quilt top. Do not allow the iron to contact the Misty Fuse.

Misty Fuse has done it's job.

I am lifting the edge here to see if the MF has fused the layers together. If the layers still lift, simply continue to press until the layers are fused. Trim away the excess Misty Fuse. I save these small pieces for future projects.

Step two of fusing the quilt sandwich.

Flip the entire sandwich over. Place another layer of MF on the backing side of the batting, then layer the backing on top. Repeat the pressing to fuse the backing to the quilt sandwich.

The finished fused quilt.

My little quilt is now ready for quilting. The entire process took a few minutes and not a single pin was involved!

I wish you could feel how light the quilt stays, even with two layers of fusible in the quilt. Better yet, it will not affect your needle in any way. No thud, thud, thud as you are sewing, no chunks of fusible gluey residue. Misty Fuse is a wonderful fusible web product and I can not sing it’s praises loud enough! In fact, I want you to know just how fabulous this stuff is… I am GIVING AWAY 5 YARDS OF MISTY FUSE to one of my readers. Here’s what you have to do….
Subscribe to my blog and leave me a comment. That’s all! ( Gets you one entry.)

For chances at additional entries you can:
Follow me on Twitter, and Tweet this contest including @quiltcetera in your tweet. (and leave another seperate comment.)
Blog it. (and leave another separate comment.)
Join my Facebook Fan Page, A Quilty Kind of Girl (with a separate comment)
Join the Misty Fuse Facebook Fan Page (with a separate comment)

It is really important to leave each entry as it’s own comment here on this blog post, so I can keep track of each time you enter! You wan to win right? 🙂 Contest is open until Monday April 12 at midnight MST. Winner to be chosen by random number generator and announced next Tuesday. Good luck!

Quilty Hugs,
Bradie

March 23, 2010

Tutorial Tuesday – Machine Applique – Part One and Day two of Easter Mini Quilt Along

So today’s post begins with some big fat excuses. First of all, I have a cold in my sinus area, that is making it a constant challenge to remain vertical. Second of all, my two oldest darling daughters are away on a school trip. That means that 98% of the chores in the house need to be reassigned. (Dear daughters, Mommy misses and appreciates you so much more than you will ever know!!) So now that is out of the way, I should tell you I did not get nearly as much done as I wanted to last night. But not to fear, I still have part one of the machine applique tutorial ready for you my quilty friends. So let’s get going k? 🙂

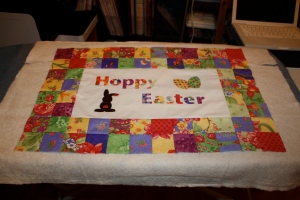
Hoppy Easter!

These are the letters we will be using for the applique. The letters have to be backwards because we will trace them onto fusible web then attch to the back of the fabrics.

Letters traced onto fusible web.

Place the fusible web on top of your letters and trace around the shapes. Leave about half an inch space around each letter.

The individual letters all cut away from each other.

Cut the letters apart from each other. Leave about quarter inch of paper around the outside of each one.

Experimenting with placement of letters.

Set your iron to the silk setting with no steam. While it heats, move the letters around to decide where you wnat them on the fabric. I made mine very flowery and colorful. Remember you are placing the fusible on the BACK of the fabric.

Letter attached to the fabric.

Once you've decided you like the letter orientation, press the fusible, paper side up, onto the fabric. Hold it for about 3-4 seconds then lift iron to see if it has attached. Do not hold the iron on for longer than that. If the glue overheats, it loses effectiveness.

Back side of letter after cutting out.

Cut out the letters including the centers where necessary. Leave the paper on the back for now.

A peek at the front of the letter.

Phew! Are you relieved? It's not backwards!

Applique letters after cutting out.

See how flowery and pretty they are? Carry on with this method until you have all the letters for Hoppy Easter.

Leftover scraps from charm squares.

Some of your scraps will still be usable. Toss them into your tash, or use for more letters.

This is where you can download the words for the Easter mini quilt. There is no need to reverse the letters or resize, they are ready to use. So your homework for today is to print out your letters, and trace them onto the fusible web. Press the letters onto the back of your fabrics, and then cut them all out. If you keep the paper on the back, it will protect the glue until we are ready to put these on the quilt. We still have a couple of applique designs to do, attach borders, and stitch down the applique shapes. Now don’t forget, if you have any questions, be sure to either leave a comment or email me. bradie at quiltcetera dot com.

I’ve also started an Easter Mini Quilt Along flickr group for everyone to add their photos. Be sure to join and share with us!

QuiltersDaily Blog-Along

QuiltersDaily Blog-Along

Have you been blogging along with us? Don’t forget that blogging along can earn you a chance to win $200 in long arm quilting services, so make sure to join in! I will see you all tomorrow for Day 3 of The Easter Mini Quilt Along!

Quilty Hugs,
Bradie

March 16, 2010

Tutorial Tuesday – What is YOUR thread weight?

After spending some time stitching on another machine, I quickly realized that something was different. I took a close look at the thread, which seemed really large. I inspected the thread cone and found the thread was a 35 weight. I normally use a 50 wt thread for piecing, so I was interested to see how the different thread weights would affect my piecing.

I chose one brand, Aurifil, in four different thread weights. I stitched out an identical sample in all four. I used the same fabrics for every sample, and used 50 wt thread in the bobbin. The following pictures document the results of my experiment in thread.( Click on the images to see a larger picture.)

Four samples of Aurifil Thread.

Here are four samples of Aurifil thread. Starting on the left is 50 wt, 40 wt, 28 wt, finishing with 12 wt on the right.

Four cones of Aurifil thread in various weights.

These are four cones of Aurifil thread, same color, different weight.

Sample of 50 wt thread.

The seam allowance of the 50 wt thread measures exactly a quarter inch.

The 50 wt thread sample after pressing.

Perfect! the 50wt thread has delivered exactly the result I want, a size of 3.5 inches.

Sample of 40 wt thread.

The seam allowance of the 40 wt thread measures exactly a quarter inch.

The 40 wt thread sample after pressing.

Hmmmmm. Looks like the 40 wt sample has come up a hair short of 3.5 inches.

Sample of 28 wt thread.

The seam allowance of the 28 wt thread measures exactly a quarter inch.

The 28 wt thread sample after pressing.

The thicker 28 wt thread has finished quite a bit short.

&nbsp

The 12 wt thread sample after pressing.

The thickest thread, 12 wt, has come up the shortest. Almost 1/8 of an inch! It would only take 8 patches for the quilt to finish a FULL inch short.

Sample of 12 wt thread.

The seam allowance of the 12 wt thread measures exactly a quarter inch.

Isn’t it interesting to see how the thread affects the piecing? When I first began sewing and quilting, I would buy my thread from the bargain bin. The cheaper, the better! Looking back now, I laugh at myself, who was willing to spend $16 for a meter of fabric, but only 99 cents for a spool of cheapo thread. I did not learn anything about the weight of thread until I worked in a quilt shop. As I replenished the shelves with tiny little spools, I had plenty of opportunity to examine each and every weight of thread.

Here are some tips for using threads according to their weights:
50 wt – ideal for piecing. Also good to use in the bobbin when quilting with a heavier top thread.
40 wt – beautiful for quilting or top stitching.
28 wt – for quilting when you really want the stitching to show. Also ideal for hand quilting.
12 wt – perfect for hand quilting, applique and top stitching on garments.

Anytime you use a thread heavier than 40 wt on your domestic machine, it is wise to switch to a size 16 top stitching needle. The larger eye on the needle will allow the bulk of the thread to travel without fraying.

Do you have any experiences to share about thread weight? Comment below to share your experience!

Quilty Hugs,

March 9, 2010

Tutorial Tuesday – Piecing Flying Geese Units

After trying three different ways of making Flying Geese units, I have concluded that this is my absolute favorite. The advantages to this method of piecing flying geese are:
-making four flying geese units at once.
-no waste of fabric.
-it’s very accurate.
I must tell you that I did not discover this method piecing flying geese. I was first introduced to this method while making my Moda Greenpiece quilt last year. I have been so excited ever since, I seriously can not shut up about it!

To make four flying geese units as shown in this tutorial, you will need:
one square for background fabric measuring 7 1/4 inches,
and four squares for geese fabric measuring 3 7/8 inches.
You will also need a ruler handy, pins, and a marking pencil.

Small squares to be made into Flying Geese Units

Small squares to be made into Flying Geese Units. These pictured are 3 7/8 inches.

The geese in the flying geese units.

Begin by laying out the small squares 2 at a time.

Marking the squares for Flying geese piecing.

Lay a ruler diagonally on the square and mark with a pencil from corner to corner.

The background for the flying geese units.

This fabric is the background for the flying geese units. Pictured is a 7 1/4 inch square.

Placing the geese on the background for stitching.

Place one small square in one corner of the large square lining up the raw edges.

Placing the second geese on the background fabric.

Place a second small square in the opposite corner lining up the pencil lines and the raw edges.

Placement of pins before sewing.

Place a pin at each corner, and one in the center to hold all the patches in place.

Close up of the pinning.

A better close up view of the pins holding fabrics in place.

Placing the flying geese unit under the presser foot for sewing.

Use the pencil line as your quarter inch guide and stitch on the left side of the marked lines. Turn patch around and sew on the other side of the pencil line as well.

A close up of both stitching lines.

This is how your patch will look once both seams have been stitched out.

Use a ruler to cut the patch in half.

Place a ruler on the pencil line and cut the patch in half.

The large flying geese unit cut in half.

This is what your patches will look like once you have cut in half.

Half way through making flying geese units.

Press seams towards the darker fabric.

Adding the next sqaure to complete the flying geese units.

With one of units you've created, place another small square in the corner lining up the raw edges. Make sure the pencil line runs through the midle of the two peaks. Pin in place.

The two seams after stitching again.

Sew down both sides of the pencil line, like you did in the previous step.

Using a ruler to cut the final stage of the flying geese units apart.

Line up the ruler with the pencil mark and cut the half unit into quarters.

This is how your quarters will look after cutting in two.

Press seams towards the darker fabric, and trim the little doggie ears that hang off the edges.

Four quick pieced Flying Geese Units.

This recipe yields four flying geese units. These are now ready for piecing into any quilting project. Each unit will measure 6.5 by 3.5 inches.

Give this a try the next time you are making a star block. I’d love to hear what you think.

QuiltersDaily Blog-Along

QuiltersDaily Blog-Along

Have tutorials of your own to share? Visit us over at Quilters Daily to share your quilting tutorials with other quilters. Have you discovered other tutorials on the web? Feel free to stop by and share those as well!

Quilty Hugs,
Bradie

PS. Subscribe to A Quilty Kind of Girl today so you will never ever miss a single Tutorial Tuesday. 🙂

March 2, 2010

Tutorial Tuesday – Quarter Inch Accuracy

Filed under: QuiltersDaily Blog Along — quiltcetera @ 1:00 am
Tags: ,

One of the most common questions I get from quilters is “How do I get my blocks to finish the proper size?” Most of the time, quilters are using their quarter inch presser foot, but for some reason, the piecing is not accurate. I’ve put together a series of photos to illustrate what can go wrong when piecing and how to solve the problem.

2.5 inch strips of fabric

Here are two strips each measuring 2.5 inches wide.

Two strips sewn together.

I've sewn both strips together using my quarter inch presser foot. The width of these two pieces should measure 4.5 inches.

Measuring the width of the strips.

When measured, these strips are only 4 3/8 inches wide. What went wrong?

Measuring the seam allowance.

After measuring the seam allowance, I can see that it is just slightly more than a quarter inch. Could that really make a difference?

Side view of the strips.

Here you can see how my pressing did not quite flatten the fold as well as it could have.

Ripped stitches.

Since this seam needs to be 'unsewn' or frogged (rip it, rip it) I will pick every third stitch on one side of the piecing.

Ripped stitches, view of other side.

The thread on the other side of the piecing should pull away in one long thread, allowing me to separate my fabrics.

Using a ruler to measure my quarter inch.

When I measure the seam allowance, at first glance, it looks as though it is accurate. But look closely at the right side of the ruler. See the tiny, tiny gap between ruler and metal guide. That is the excess. The needle position needs to be moved slightly to the right, closing up that wee gap.

An accurate quarter inch, measured.

Once I've moved the needle position just a thread to the right, I sew my seam again. See how it is just one thread under a quarter inch? This is called a scant quarter inch and it is ideal for quilting.

An accurate 4.5 inch measurement.

Checking my measurement shows the piecing is accuarately 4.5 inches wide.

Side view of pressing.

This time, I pressed the fabrics to lay flat, contributing to the accuracy of the piecing.

Quilters Daily Blog Along

The needle position of most sewing machines is adjustable. Dig out your manual if you are not sure how to move the needle position. Move the needle one fraction at a time, and use the hand crank to slowly lower your needle to the down position. Make sure the needle does not impact with your presser foot, as this can be very dangerous when sewing. Keep your ruler handy to measure the distance between the needle and the guide.

** EDIT ** This comment was left regarding moving your sewing machine needle. Anne has shared an excellent point that I would like to share with all of you.
“Your photography does a great job of demonstrating what you are explaining. Thanks for taking the time to do it so well. I usually piece with a straight stitch plate, so folks should be careful when moving their needle over. Test it by hand first to see that you have the clearance otherwise use the zig zag plate. I can’t tell you how many times I’ve forgotten about having the SS plate on while in the throes of an exciting creative brainstorm. I’ll switch to a decorative stitch and then BAM! The needle explodes into pieces while I have a heart attack hoping my machine is ok!” Thanks very much Anne!

Now for those of you who were asking about more intricate seam nesting, Rachel over PS.IQuilt has done a tutorial for Half Square Triangles, plus she shows a neat little trick to reduce the bulk in a pinwheel block. Head on over to her blog to see how she does it.

Quilty Hugs,

P.S. We are now the Official Canadian Retailer of Christopher Nejman’s brand new CD Book CELEBRITY BAGS.

Take advantage of our pre-order event before we start carrying stock later this month and receive free shipping anywhere in Canada.

Bradie

Don’t forget to visit Fabric Heaven!

Blog at WordPress.com.